Simon Prescott: The Story Behind Marvin and Marigold: The Big Sneeze
September 1st, 2017 I’m going to give you a brief idea of how I make a picture book from start to finish. For this particular picture book I didn’t write the text but was responsible for the artwork. Mark Carthew wrote the story for Marvin and Marigold: The Big Sneeze. This can be easier as I only need to focus on the images, it’s less pressure but has it’s own challenges. First I received a copy of the story manuscript, this shows which parts of the text go on which pages. A writer may also include notes to help describe the action, what kind of things might be happening in each spread. I have to interpret that into images that will work with the text on the page and help tell the story.
MAKING THE BOOK
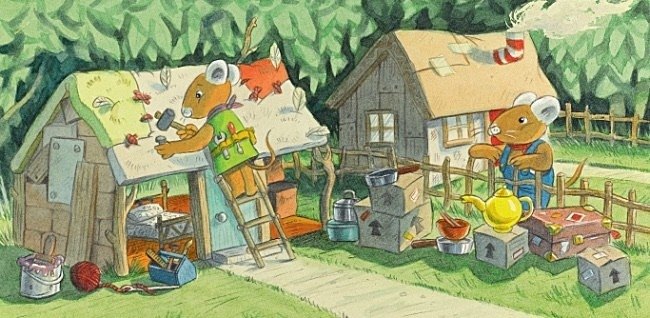
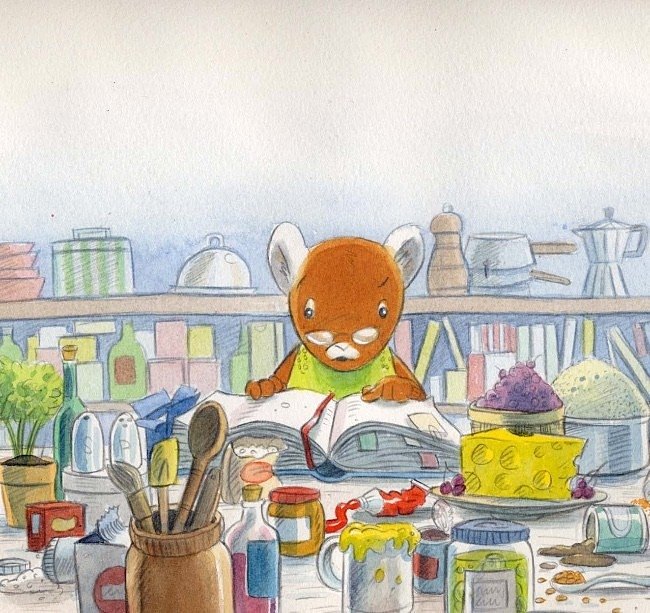
The images that I particularly enjoyed making were Marigold building her house in spread 4/5 and Marigold's kitchen on page 8. In the story Mark listed details and actions that had to be included in these spreads. I had to then think what other kind of things might begin the scene, like building equipment and Marigold's belongings. In spread 8, Marigold's kitchen has all kinds of pots and potions a big book of recipes and remedies. (I showed a hint of these on spread 4/5) For this spread I wanted her kitchen to look busy and add interest and lots of details for the reader to discover. your own text here or drag and drop a snippet from the panel on the right.
MAKING THE BOOK
The images that I particularly enjoyed making were Marigold building her house in spread 4/5 and Marigold's kitchen on page 8. In the story Mark listed details and actions that had to be included in these spreads. I had to then think what other kind of things might begin the scene, like building equipment and Marigold's belongings. In spread 8, Marigold's kitchen has all kinds of pots and potions a big book of recipes and remedies. (I showed a hint of these on spread 4/5) For this spread I wanted her kitchen to look busy and add interest and lots of details for the reader to discover. your own text here or drag and drop a snippet from the panel on the right.
IDEAS/SKETCHES
I start with some little sketches based on ideas or directions taken from the text. I come up with a few different versions of the character. When I have settled on a final design I will then think about the characters in different poses and scenes.
I start with some little sketches based on ideas or directions taken from the text. I come up with a few different versions of the character. When I have settled on a final design I will then think about the characters in different poses and scenes.
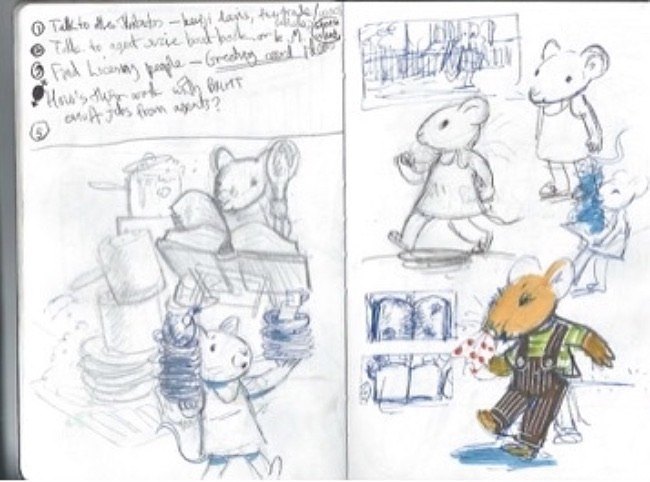
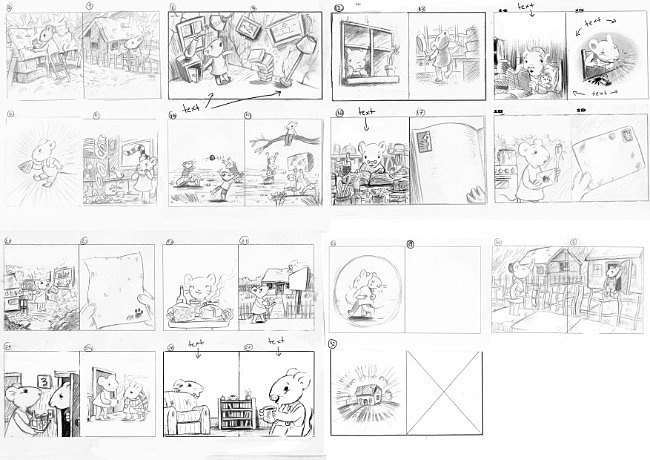
These sketches will eventually turn into small thumbnail sized drawings. Each thumbnail represents a spread in the book and shows roughly what happens on each page. All the thumbnails then go into a storyboard which lets us see to see how the whole book will look and feel from start to finish. At this stage it’s important to have the mind the reader, how to keep them interested and want to turn to the next page!
ROUGHS
Now we are at the rough's stage. I will enlage the thumbnail drawings to scale or slightly larger than the final page size of the book. The roughs will include more detail and space for the text to go in. All the roughs for all the pages need to be signed off by the editor. This is so any changes can be made before I go onto the final artwork stage.
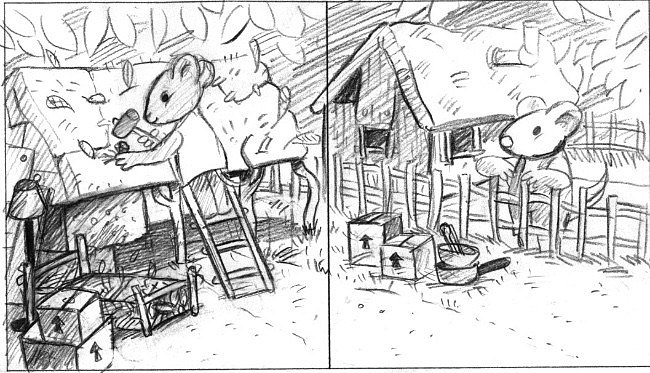
Once the roughs are completed I will start the process of painting the artwork that will be seen in the final book. I will begin by printing out each spread in turn so I can trace the outlines onto water colour paper with pencil ready for painting later. At this stage I will add more line detail and will generally clean up the images. I may even add a few extra little detials to add interest.
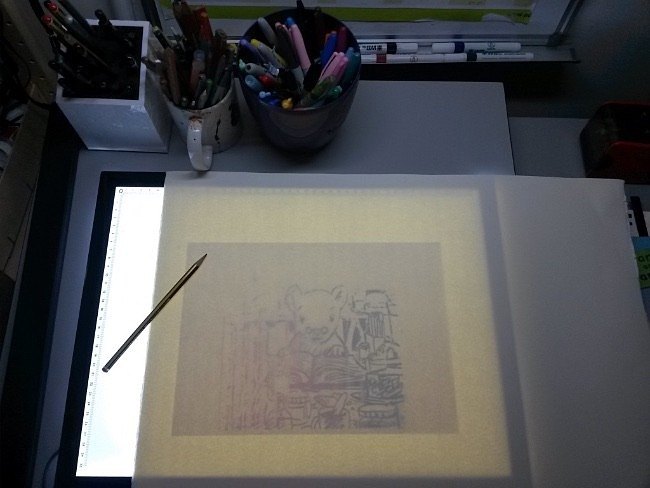
Before I add colour I may do a few test runs or color studies. I do this to plan out how I will paint the image. I want to get the right colors and any paint effects planned to avoid any mistakes. I mainly use graphite pencil and watercolor to cretae the artwork and sometimes coloured pencil for extra detail and texture.
Once all the artwork is completed, including the cover, endpapers and title pages, it will then go off to be scanned. Before it goes to print I will see the scanned artwork, any mistakes can be corrected digitally if needs be. Once everyone is happy It will then be put together in the final book that you see on the shelf in the bookshop.

Comments (0)
No comments have been submitted yet.
Why not be the first to send us your thoughts
Leave A Comment
Thank you for your comments, they will appear shortly once approved.
View by Category
Latest PostsPopular Posts1
Higher Ground selected for Blue Ribbon Awards 2025 Graphic Novel listJune 30th, 20262
The Story House has been chosen by Inclusive Books for Children (IBC) as a top book pickJune 26th, 20263
Skipping to Sammy's Beat - Read to the Beat!June 5th, 20264
Higher Ground longlisted from Carnegie Medal for IllustrationFebruary 10th, 20265
Higher Ground featured in the 2026 Read for Empathy CollectionFebruary 5th, 20261
123 Tea Party! The History of Afternoon TeaJune 25th, 20192
Oscar-winning Reese Witherspoon to read Extraordinary!January 27th, 20223
Simon Prescott: The Story Behind Marvin and Marigold: The Big SneezeSeptember 1st, 20174
New Frontier Publishing to Publish Vogue Williams’ First Children’s BookJanuary 27th, 20225
New Frontier Publishing to Partner with WWT (The Wildfowl & Wetlands Trust)January 27th, 2022